Friday, November 5, 2021

Antique night table lightened up

 I rescued this night table from the trash.  It has great bones and is solid.  Although it looked original, at a closer look I could see that veneer had been repaired and a new stain and polyurethane was put on top. It was uneven in areas. So I sanded off the top to reveal the original veneer. 


After giving the top new stain and polyurethane, I set off to lighten the dark stain.  Using chalk paint, clear wax, and antiquing wax, the front and sides were complete. It’s ready for a new home.


Wednesday, October 20, 2021

Old French Provincial to Modern Coca-Cola chest


I had a French provincial bedroom growing up in the 1970s.  Perhaps for that reason, the style just doesn’t look modern to me. So when this freebie came home with me, I first started by taking off all the hardware and filling in the holes with wood filler.


Next, the feet had to be changed as well as the bottom kickplate so it would not resemble the old style. With some scrap table legs, I cut some new front feet. An old piece of antique walnut became the new kick plate, and with that, it was reassembled for painting.

Since I knew I’d be using a decal, I chose chalk paint for the base paint.  A water based finish would be needed for the decal and wax seemed the best option.

With two coats applied, the chest was ready for decals.  Being a Coke-Cola loving family, I purchased this decal off of Amazon.  It also came with a 5 cents image also that I chose not to use.  And with the decals applied, and a wax finish on top, our family has a new blanket chest.


Tuesday, February 16, 2021

DIY Floating Shelves


I have a growing collection of embossed antique milk bottles that have outgrown their cabinet and wire holders.  In order to display them better, I decided to make some floating shelves.  All you need is:

  • Wood: 1x2s for the front, 1x4s for the bottom and back (if you prefer a higher back than a 1x6)
  • Wood Screws and wood glue to attach the back to the bottom
  • Nail gun to attach the front piece
  • Wood Screws to attach the shelf to the wall
  • Stain and/or sealant


Cut the wood to the length of whatever you're wanting to hold and assemble.  Choose a stain color of your choice.  After assembly, mark out the studs on your wall.  Since I was holding glass bottles which are much heavier than smaller knick knacks, I wanted to make sure that no anchors were used and the screws went straight into studs.  In order to do this, I drilled holes into the back of the shelves to line up with the studs.  Attaching the shelf straight to the wall also makes it flush with the wall rather than a small drop forward that you get with a hanger off the back. 

Flush mount

And the finished product is flush and built to size for whatever collection you want to display!  I added some old photos to match the bottles I was displaying.


Friday, January 15, 2021

Seaglass Holder with Recycled Products (Yoplait Oui Jars!)

Just a few jars of gifted seaglass

I'm a collector of seaglass and other items found on the beach.  This has created a backlog of items with no where to put them.  Add to that, I've since gained some "sea-sters" who love to swap seaglass with me.  So along with my collection, I now have seaglass and sand from all over the world.  I don't want these just lumped in with my East Coast seaglass, so I made my own holder for them.


To start, I gathered some scrap wood and several Yoplait Oui glass jars that I had been saving.  If you've seen these jars, then you know they are too cute to just put in the recycle bin!  After measuring the wood to cut to the length I needed, I assembled the box, added a bottle and started filling the jars!  Quick labels allow me to show where each collection is from around the US and the world.


Now I just need to make another box for the growing collection!

Saturday, December 12, 2020

Seventies to Nautical (Coffee Table updated)


My free table


 I found this 1970s circular table for free a year ago which was perfect for the space in our living room.  However, it was worn and drab.  After finding some rope on the beach (it really was just washed up!) I decided to incorporate it into the table to make it more beachy.  With a little chalk paint and wax, the table was updated to an off-white.  Then the rope was glued on and we had a new nautical feel to our living room to complement the navy loveseat with off-white cushions.


Saturday, May 4, 2019

Buffet Server Turned Tv/Media Center


When driving with my husband, I often make him pull over for furniture on the curb.  He used to roll his eyes.  But on this day back in 2017, he was the one who saw it first and pulled over.  There it was, a broken down antique server on the curb for trash!  We loaded it up and brought it home. 
I have to admit, the server sat there for awhile in the garage while I decided what to do with it.  The drawers were broken, as well as a leg,  the top veneer was peeling.  However,there was still life left in it.  The piece just neeed a new purpose.  After removing the legs, it looked like a media center and so that’s what it became!
After sanding, patching the veneer and priming the top and doors, they were ready for some navy paint....think Man Cave!  The drawers were replaced with shelves and wheels were added to the bottom.  It was quickly sold to a local man for his TV and media equipment!


Sunday, November 5, 2017

DIY Manly Bachelor Dresser

Furniture often finds me through friends or just waving on the side of the road.  They come in all shapes and sizes, but mostly it's dressers and desks that find me.  This solid baby was already half stripped when the previous owner gave up on him.  With all the drawers intact, and it being a very solid piece, there weren't any repairs to be done except completely the sanding.  Rather than strip the rest of the dresser, I added paint to the finished areas and new hardware to the drawers.
 Dovetail drawers, that are solidly still being held together are the reason this dresser had to be saved and find a new home.  Look at those solid joints!
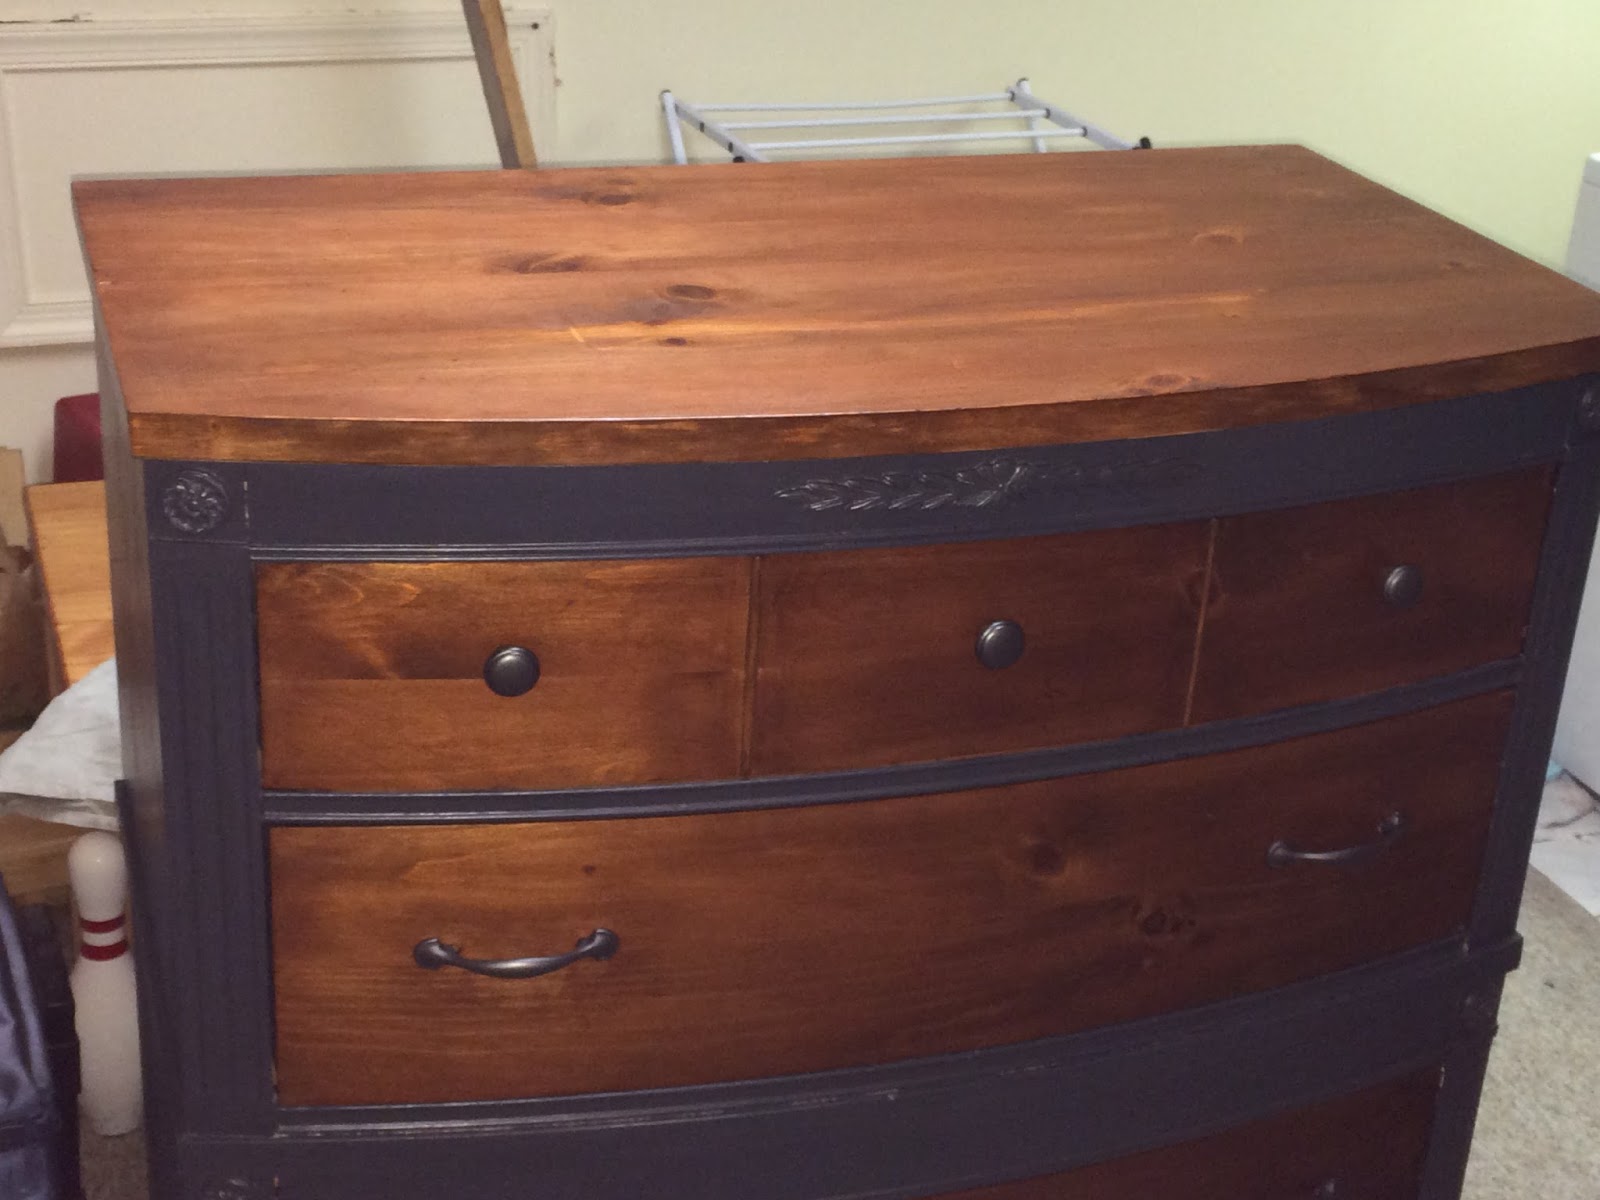
 After sanding and re-staining the top, I taped it off and began painting the sides and dividers in a dark smoky blue.  With the drawers freshly stained to match the top, new hardware was added to complete the look.
Look at those knots and natural grain in the top!

Paint brought out the details in dresser while making them more masculine
The finished dresser
Within a day of listing the dresser for sale, it was snapped up by a young man starting out on his own.  It left for a bachelor pad,...just as planned.