Thursday, March 7, 2013

French Provincial Facelift

The wonderful thing about quality furniture is that you really can pass it down through the generations.  My original french provincial bedroom furniture had already undergone a makeover to become my preteen's dresser and nightstand.  However, now my younger son who shares a room with him, needed a nightstand to match.  So off to the local thrift store I went and happened upon an almost identical match!

BEFORE
The moulding was a little different than the other, but that was insignificant since the moulding is always the first thing to go!  So I unscrewed the moulding (it's that simple!) and pryed off the little frenchy thing at the bottom.  A little primer and I was on my way.

Notice how there's Frog Tape on the top of the night stand?  My sister is a fan of retro formica/laminate.  She thinks it's the best thing out there for durability and withstanding stains.  She might be right.  It's not my style, but I decided to keep the top since this was going to be a nightstand for a 7 year old.  A little durability was the extra bonus I needed in this night table.  I also decided to match the night table to his dresser which was a dark wood, rather than the dark blue furniture of my other son.  And here's the final product.  As much as I wanted to buy new hardware, my son wanted to keep the original drawer pulls.

AFTER
 
And a view of the top!

Wednesday, February 13, 2013

Homemade Bible Valentines (with Conversations Hearts)


While scanning Pinterest this year for homemade Valentine ideas, I came upon a "pin" for "God's Conversations Hearts".  What a great idea!  I pinned it and planned to go back later to make them (later is today).  However, like many links on Pinterest, you're left with the original pin that no longer takes you to a real link.  Either the link has gone bad, it's no longer found, or it's a "suspicious" link.  I haven't yet figured out what makes it bad, but either way, I had this great Valentine idea that led to nowhere on the Internet except a message saying this link could no longer be found.  So I can not take credit for the verses and the idea, but I present to you a simple Valentine that can be done with a few scrapbooking supplies at home.

First, I copied out the words and reprinted them on to white cardstock.  For an easy image to copy and paste, see below.  I then used some scissors I had from eons ago that make the scalloped edging.  After they were cut out, and pink cardstock cut for behind, I laid out my supplies.
Just a few supplies laying around the house

The red sheer bags I had picked up for pennies at a local Beadfest event and finally was using them for something other than earrings. So far, the only thing I've purchased are the Conversation Hearts.  Once the verses are taped on to the pink cardstock, simply fill the pouches or baggies, and attach them to the card.  Simple!  Happy Valentine's Day!


use the image to make your own

Thursday, February 7, 2013

Build Your Own Gemstone Sifter


Mining sifter created by my talented husband
When my son wanted to have a gemstone mining party for his birthday, we had the task of creating a mining site in our backyard.  After purchasing the gemstone sluice bags at Cherry Crest Farm for $5 each (an awesome place to play, and much cheaper than ordering them online) we just needed a way to sift out the gems.  So I went out and bought the baby swimming pools on clearance, while my husband got to work with some rough plans we found online.

Kyle building 6 sifting boxes
We decided on one box per two kids.  Each kid would have a buddy to hold the sluice bag as well as the ziploc to put in the gems he found.  When the gemstone bag was empty, they could switch turns of being the sifter and the holder.  Each kid got his own gemstone bag to sift.

The following items needed to build the sifting box can probably be found in your leftover wood scraps.   
Needed
  • 1x4's for the walls of the box
  • 1x2's for the bottom edge to protect fingers from the wire
  • 1/4" wire mesh for the bottom
  • screws
  • extra 1x2's for the handles

When you put it all together, you have a mining party!  Fill the pools with water and let them rest the sifting boxes on top of the water.  It's not running water to take away the dirt, but the dirt falls right to the bottom of the pool revealing the gems anyway! 

Although there were many fun cakes on the web for a gemstone party, my son also has a love of Minecraft.  Being that the game is based on building and mining, it seemed a fun way to compliment the gemstone mining.  So ta da....Minecraft cupcakes!

Wednesday, January 9, 2013

Repurposed Pasta Sauce Jars

Take a close look at your store-bought pasta sauce jars and you'll find that many of them are common Atlas Mason jars.  I purposefully buy Classico because they not only make delicious sauce, but you get a true Atlas Jar in the end.  Of course glass is recycleable, but with so many brands of food switching to plastic, I enjoy the feel of a nice heavy glass jar.  For that reason, I started running mine through the dishwasher to resuse later. 

[On an important side note, the regular canning jar screw-type lids fit these jars!  So ditch the tomato-smelling metal lid and use it open, or with a new canning jar lid.]  Now on to the craft!

What happened this week was that my New Year's Resolution collieded with my crafting personality.  And voila, I have a new motivational craft made out of leftover pasta sauch jars!  While scanning Pinterest, I found a perfect use for the jars that mixes with a personal goal...Motivational Marbles!  So I decided to make my own set to motivate me to eat healthier and lose weight.  Here's all you need to create your own motivational marbles glass duo.

2 Glass Jars, Glasses, or Vases
Glass marbles from any craft store
Paint pens in your choice of colors

[Update:  Since adding my jars to the kitchen counter, I've unknowingly added built-in accountability from my 6-year-old.  This morning he was excited to see 3 glass marbles added to the Pounds Lost jar.  Later in the day, he asked why I hadn't lost any more pounds since the morning.  At least he's watching and I wouldn't want to dissappoint!]


Monday, December 24, 2012

Christmas is all about Second Chances

When I started this blog, it was just a way to showcase crafts, DIY projects and ideas that preferably gave an item a second chance.  Call it recycling if you'd like but I think "second chance" just sounds more positive.  Recycling implies it was trash whereas second chance means it had value and was renewed.  As I read Christmas stories to our kids and listen to the Christmas songs being sung, I can't help but think that Christmas is the ultimate example of second chances.  Afterall, the Bible says that man had messed up in the garden (think Adam and Eve) and we were in desparate need of a second chance (a Savior)!  Being separated from a holy God and living in a sinful fallen world, what could be more precious, more important, than a second chance?!

That is exactly why Jesus came to earth to be born as a baby--to give us a second chance.  He is God and left all his rights and privileges behind to come and be born in Bethlehem.  It was for you and for me.  It was for new life.  It was to some day grow up and take our place on a cross and die.  It was to give us a second chance at a relationship with God.

Just like any present we receive, it is not truly ours until we open the package.  In the same way, Jesus was God's gift to man to make a way for us to be reunited with Him.  John 3:16 says that He was born for ALL of us, "For God so loved the world, that He gave his one and only son, that whoever believes in Him shall not perish but have eternal life."  He was a gift to you.  A present for eternity.  Don't let it sit unopened.  Receive the gift and open it to a second chance this Christmas.

Wednesday, December 5, 2012

Nautical Desk Revealed: Craft Desk Makeover

[UPDATE:  This desk was sold to a Chester County, PA family as a gift for their two daughters who love the ocean and seashells.]

Last year at the height of Christmas shopping, I brought home a stray desk (for free, of course).  It has sat in my basement until this month.  For some reason, I thought the height of this holiday season would be a perfect time to tackle this project.  Really, I'm not sure what I was thinking on the timing, but it's finished and I love it!  This one is for me.  Finally, a project that is all mine.  And here's the results....

Before and After, ugly castoff desk in Dec. 2011 and now in Dec. 2012!
So how did it go from little girl 1960s desk to modern day nautical craft desk?  First, I sanded down the top to see if I had real wood underneath.  Unfortunately, it is solid wood, but there was a veneer on top.  So I had to ditch the staining idea like I did for my son's desk
Boo, veneer.
So onward I went to priming the desk and painting it white.  In the meantime, I had to remove the blue metal insert plates on the drawers, as well as the handles and decorative moulding.  Unlike moulding in the past that is screwed in with the handles, this one had tiny nails so it just needed a little prying off to reveal a flat-front drawer.
Finally, flat front drawers!
While the paint was drying, the handles got an overhaul with Kilz spray primer (already had it on hand) and white spray paint.  Normally, I love the opportunity to shop for new drawer pulls, but I wanted to preserve a little of the original desk and they were good heavy metal pull. Plus, it gives the desk a little feminity.
Spraypainting on an unusually warm December day
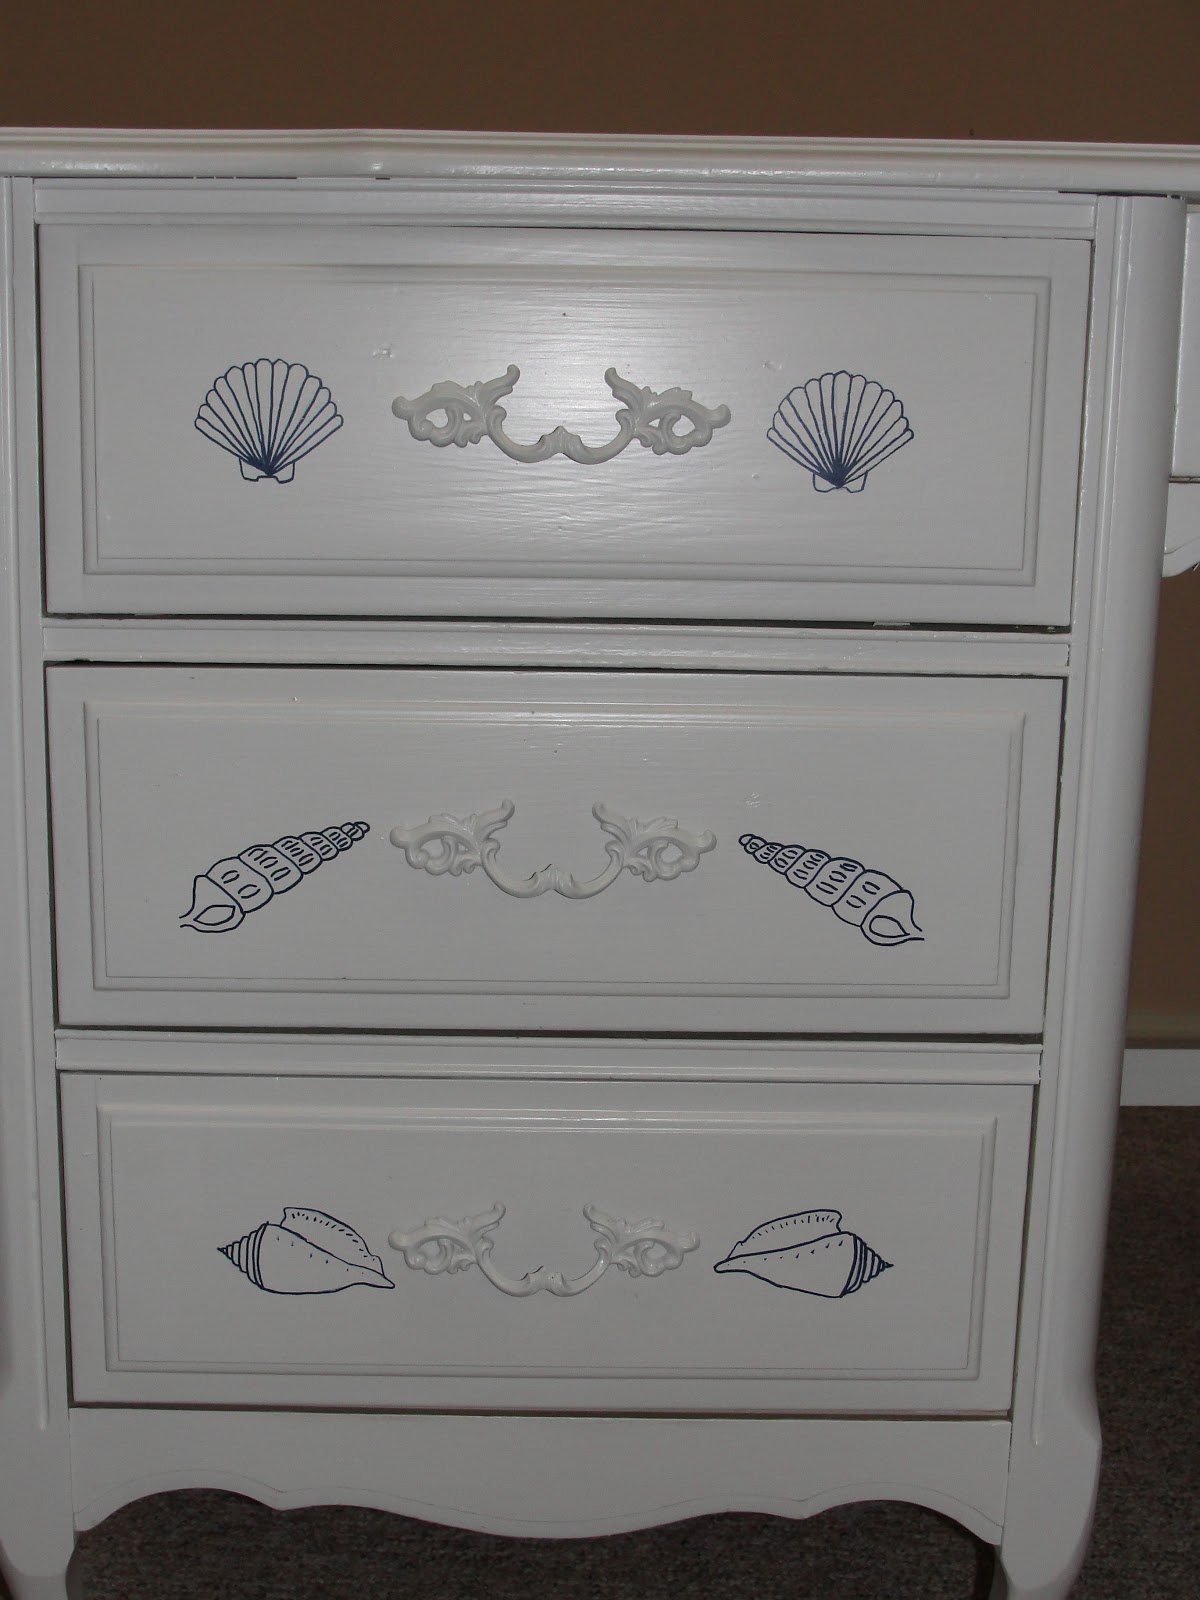
Next, came the fun/hard part.  I wanted to make this desk a nautical theme.  Nothing inspires me more than the beach and if this was to be a craft desk (a place of inspiration) then I needed some images of inspiration around me.  To see how I painted on the designs, refer to my previous blog (click here).  So here's the drawers, before and after!
BEFORE
AFTER
AFTER

AFTER
I can't wait to get the drawers filled with supplies and start creating. Maybe Santa will bring me some new craft organizers.
Side view with the nautical compass
And a beautiful nautilus right on top
One final view

Monday, December 3, 2012

Nautical Desk Sneak Peek: Transferring Images the Old Fashioned Way

My current project is finally for me!  This time, the desk is all mine.  I'll give you more details about that when it's completed.  For now, I want to give you a sneak peek at one of the nautical images that will be on the desk.  I do not own a fancy shmancy Silhouette Machine or a Cricut or any other time-saving, ridiculously over priced transfer tool.  Don't get me wrong, I'd love to own one, or win one from all the blogs doing giveaways.  But for now, I'll have to settle with the hands God gave me and a No.2 Pencil from Staples. 

Does anyone remember the "old-fashioned way" of transferring images?  Remember tracing paper?  Ok, so maybe I didn't go as far back to the days of tracing paper.  Here's a quick tutorial for those still waiting for Santa to bring the modern time-saving tools.

1.  Select the image you want to use.  Pick from a book, a clipart website, download and print from Google Images (which is where I got this nautical compass/star) or draw one yourself.


2.  Flip the image over and trace the reverse image on the back with a dark pencil (#2 or darker). 
The back of the paper after I've traced over it with pencil
 
3.  Flip the image back over and tape it to your project.  Then carefully retrace the image design.  The pencil underneath will be lightly transferred to your project. 
Tape and retrace on the original side
4.  Remove the paper and you'll see the pencil etchings.  Then choose your marker or paint to make the image darker.  I've used Sharpie markers in the past however this time I chose the DecoColor Paint Markers in Ultramarine Blue.  I love these because they glide on with the fullness of paint but with the steadiness of a pen. 

When finished, it looks like a hand-painted design!  After I finish the rest of the images, and seal the desk, I'll post the finished project.